FCP7 Keyboard Shortcuts and Editing Methods
(with contributions from Neil Ortiz, from Philadelphia Neighborhoods)
Get in the habit of not using drag and drop. It is good discipline to use the keyboard shortcuts to either overwrite to the timeline or insert to the timeline. This ensures that the editing process is done with absolute precision. It is also in line with the editing methods used by pretty much every major media organization.
Customize the keyboard so that you don’t have to move the mouse around as much.
Important: Some Mac OS X keyboard shortcuts may conflict with your Final Cut Pro keyboard shortcuts. For more information, see Customizing the Interface in the online FCP7 Manual.
Keyboard shortcuts to Playing Video:
“L” = Play (forward)
“K” = Pause
“J” = Play video in reverse.
By hitting the L or J key multiple times, you can increase the speed of the playback.
“Spacebar” can also be used for Play and Stop/Pause.
To be frame-accurate on where you want to stop your playhead, you can use the Arrow keys to move one-frame at a time, back or forward.
Arrow left, will move one-frame back
Arrow right, will move one-frame ahead.
Keyboard shortcuts for Editing:
During the editing process, you should be able to toggle back and forth between your “Source” in the Viewer window, and your “Sequence” that you are creating in the Timeline. You can toggle around all the four windows in FCP by using:
Command 1 = Viewer (Source)
Command 2 = Canvas
Command 3 = Timeline (Sequence)
Command 4 = Browser
(Press the “command” key and the number key together. The numbers at the top of the keyboard, not to the right)
3-Point Editing
There are variations to this technique, but the most common version is to select the IN and OUT points of your source video in the Viewer Window, then place the playhead to the IN point in your Timeline/Sequence, (meaning where you want this new clip to begin.) Those are your 3-points. Then you will either perform an Insert Edit or an Overwrite edit. The most important aspect to three-point editing is to only lay in what you need right from the start.
Step-by-step process on how to do a 3-point edit with only using the keyboard:
• Hit Command 4 to go to Browser.
• Use Arrow keys to go up and down the list of source clips.
• Hit “Return” to open source video in Viewer Window
• Hit Spacebar or “L” to play video in Viewer.
• Hit the letter “i” to set your IN POINT (where you want the clip to begin)
• Play video (L) to find the end of your shot/soundbite.
• Hit letter “o” to set your OUT POINT (where you want the clip to end)
• Hit Command 3 to go to TIMELINE.
• Use a combination of spacebar, L and/or arrow keys to move the Playhead to the specific frame you want this source clip to begin.
• Then hit either:
• Function F9 for an INSERT Edit
• Function F10 for an OVERWRITE Edit.
An INSERT Edit will insert your source clip from the Viewer into the timeline wherever your playhead is located. It will not erase any clip that may already be there, but it will split a clip in two, to insert that new clip at the point of the playhead in the timeline. Practice this method, and you will understand.
An OVERWRITE Edit will erase whatever clip may be at the point of your playhead in the timeline. You are overwriting the old clip, with the new clip from the Viewer. Practice this method and you will understand.
All your A-Roll should be laid out on V1 and A1 on the timeline. This includes all your interviews, narration, sign-offs, etc. Your B-Roll footage will be placed on V2 and A2 on the timeline. This includes footage that will help drive the narrative and visually illustrate your VO and interviews, etc.
AUDIO
When out in the field with your camera, it is standard to use Audio Channel 1 for Interviews and Narration. This will be recorded by the reporter using the handheld mic. Audio Channel 2 is usually ambient nat sounds. This is picked-up by the cameraʼs mic. By default, both channels of audio are set to pan left or right. They will only play on left or right sides. You will fix this by using the PAN control during the editing.
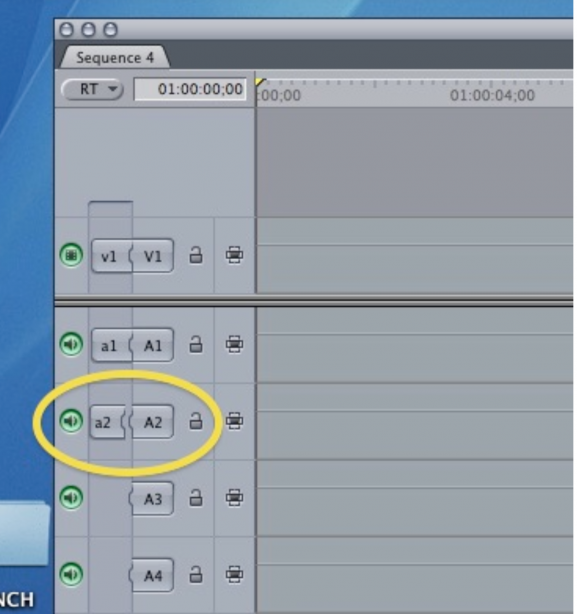
When you lay down your A-Roll first, only lay down the video and one channel of audio of the audio. Your “good audio” channel, is A1, or channel one, or left channel. Deselect A2 from the timeline during this process so as not to drop in both channels of audio at once.

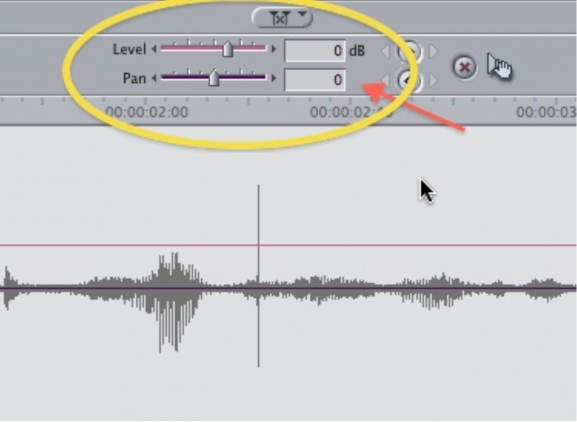
After A-Roll layer is down, go through all of the channel 1 audio on the timeline, double click each audio edit segment in the timeline and in the Viewer set the Pan to zero (center). This will play the “good sound” on both left and right channels.

When laying in B-Roll, it is best to place the video on V1, to give you flexibility on adjusting itʼs final placement. And the B-Roll audio will go on A2. It accomplish this you must set the Target Track to V1, and Deselect A1. (as seen on the next image)

Volume:
Adjust your levels and pan for each b-roll clip accordingly.
Use the OVERLAYS to adjust the audio levels. Try to average out audio at -12db but make sure the audio-level balance between the A-Roll and B-Roll is correct.
To change the volume of a clip, double-click its audio track in the timeline, then raise or lower the pink bar in the Viewer to raise or lower the volume. Make sure all your clips play at the same volume when you listen to it, which does not necessarily mean the pink bar will always be at the same place for all your clips.
Fades and Effects:
To add a fade or other effect, click the Effects tab in the Browser. Drag the effect you want down to the clip in the timeline. The most commonly used video effect is a Cross Dissolve, and the most commonly used audio effect is a Cross Fade.
Text:
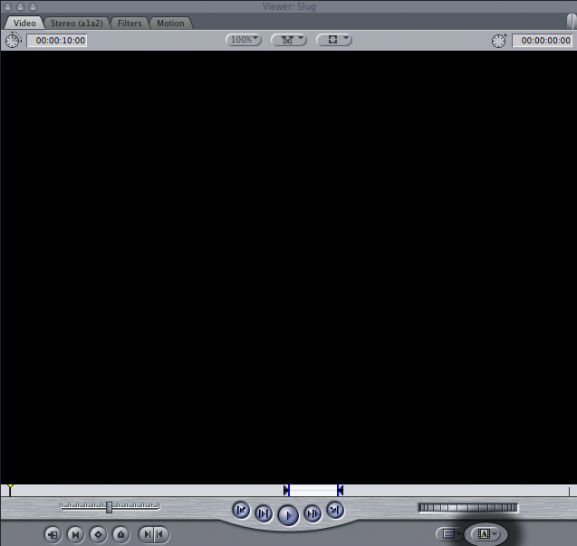
To add text to your project, click the little “A in a film” icon at the bottom of the Viewer window, go to the Text menu, and select Verdana text you want to use for a crawl or lower third. To edit the text, click the Controls tab in the Viewer window. You can also change the font, size, color and many other things in this window.
MURL uses a translucent solid black background with white Verdana text in upper and lower case. The lower third should run the full length of

Other Keyboard Shortcuts:
Command U– Creates a sub-clip. You can choose and save soundbites using this.
P – Pen Tool – Used to create keyframes on the overlay to manipulate small sections of audio.
A – Arrow Tool – Used to select.
B – Razor blade Tool – Used to edit footage already in the timeline.
General Tips for Producing a great broadcast video package
The story should be written out.
It should NOT be pieced together on the fly during editing.
You should be scripting out your stories, writing to the video that you have and then assembling it using the a-roll/b-roll timeline method. Remember to take control of your video presentation by scripting it out before you start editing.
A good video piece should be able to stand on its own as a great audio piece. You should be able to close your eyes and picture the story being aired on NPR. The piece should be filled with narration, interviews and lots of nat sound breaks and nat sound “beds” that lead from one portion of the story to another.
– Tell the story like you’re telling your friend what happened at the end of the day.
– What are the three most important points?
– What has the best video – use that at the top of the story to capture the viewer.
– Use most compelling soundbites — other than that, you can probably make the points more succinctly in voiceover.
– Look for nat/sot breaks that make sense.
– Use a standup for facts that aren’t illustrated by video

Be the first to comment