https://vimeo.com/25104000]
In stories that refer to multiple places of interest, your readers will find it useful to view an interactive map of the location. In this tutorial, you will use Flash to create graphics with rollover buttons that will launch additional web content when clicked.
Creating a New Flash File
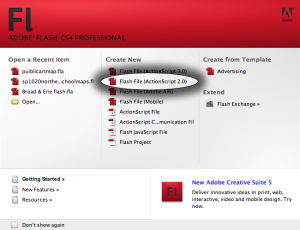
When you launch Flash CS4, the start window will appear. Choose Create New Flash File (ActionScript 2.0). Although Flash CS4 is capable of handling ActionScript 3.0, choosing 2.0 will allow novice users to take advantage of the Behaviors panel, which automatically generates code for common interactive functions. We will cover adding Behaviors in subsequent steps. Go to File> Save As… and save your file using appropriate MURL naming conventions.
Getting Familiar with the Flash Interface
The Flash interface contains five main components: 1) the Stage 2) the Timeline 3) the Tools panel 4) the Property Inspector and 5) the Library. The layout of these components may vary from computer to computer, since any user may customize their placement.
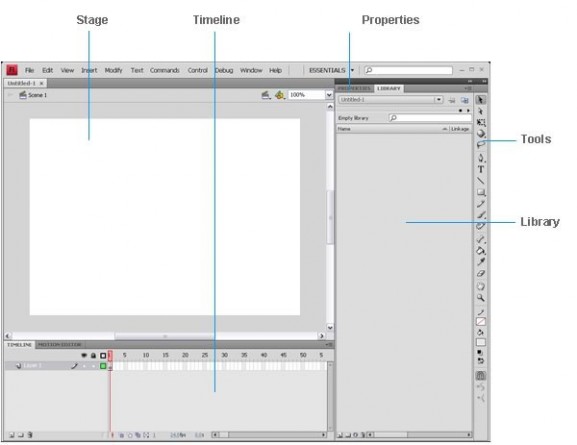
- The Stage is where your graphics, videos, buttons, and so on appear during playback.
- The Timeline controls the timing of when elements in the movie appear on the Stage. You also use the Timeline to specify the layering order of graphics on the Stage. Graphics in higher layers appear on top of graphics in lower layers.
- The Tools panel holds the general set of tools used for selecting objects on the stage and drawing vector graphics.
- The Property inspector displays editable information about any selected object.
- The Library panel is where media elements and symbols are stored and organized.
Image and definitions courtesy of adobe.com
Adding an Image to the Library and Stage
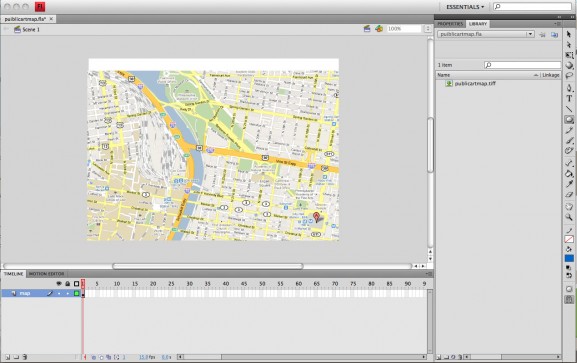
You may add an image directly to the Stage by dragging it in from its location in a file window, or by clicking File> Import to Stage and choosing the image file that you wish to import. The image will appear on the Stage, and will be automatically added to the Library. By default, it will appear in the first frame in Layer 1. It is good practice to rename this Layer to reference the image. Double click where it says “Layer 1” in the timeline to rename the layer. For example, if the image that I imported to the Stage is a map, I would rename the layer “map.”
Creating a Graphic Symbol
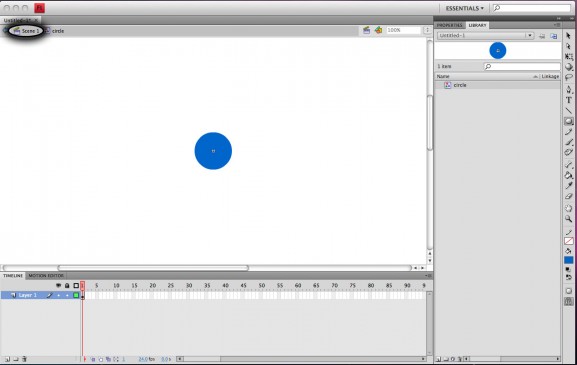
A symbol is a reusable element that gets stored in your Flash document’s Library. After you convert an item into a symbol, you can use any number of instances of that symbol in your Flash project without increasing file size. Flash uses three types of symbols: graphics, movie clips, and buttons. For this project, we are going to create a simple graphic symbol that we will reuse to create several buttons.

Click Insert> New Symbol and type a descriptive name such as “square” or “circle” in the Name field of the Create New Symbol dialog box. Choose Graphic from the Type drop down menu and click OK.
You will see a new stage with a clear timeline. Using the rectangle or oval tool, select a desired color and draw a square (or circle) on the stage by holding the Shift key while clicking and dragging on the stage. Click the Scene 1 button at the top of the Stage to return to the main Stage. You will see your new Symbol in the Library.
Creating a Button Symbol

Click Insert> New Symbol and type a descriptive name such as “button 1” in the Name field of the Create New Symbol dialog box. Choose Button from the Type drop down menu and click OK.
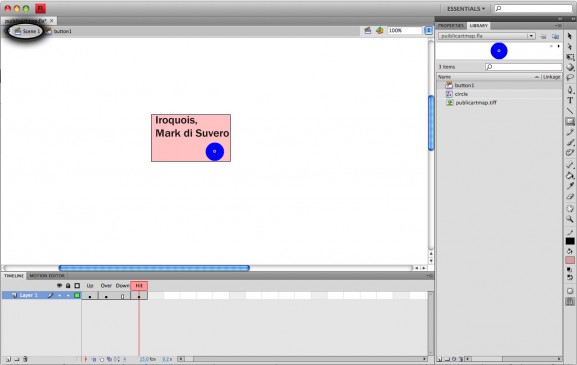
You will see a new stage with a special timeline that has Up, Over, Down and Hit states instead of standard frames.
In the Up state, drag an instance of the graphic symbol you created earlier from the Library onto the Stage.
Click on the Over state, and click Insert> Timeline> Keyframe. (A keyframe is any frame in which the contents of the frame may differ from the contents of either the previous or subsequent frames. Black circles on the timeline mark keyframes with content.) Use the Text tool to insert some relevant text next to the graphic symbol. For example, if your button identifies the name of a place, type that name next to the button. This is your rollover text. Use the options in the Property Inspector to adjust the text to your liking.
Click on the Down state and click Insert>Timeline>Frame. This will signify that there is no change between the Up and Down states.
Finally, click the Hit state and click Insert> Timeline> Keyframe. The Hit state actually defines the area that responds to a mouse-over. It is not visible in your final project. Use the rectangle or oval tool to draw a shape that covers the area where the text and graphic reside.
Click the Scene 1 button at the top of the Stage to return to the main Stage. You will see your new button in the Library.
Adding a Behavior to the Button
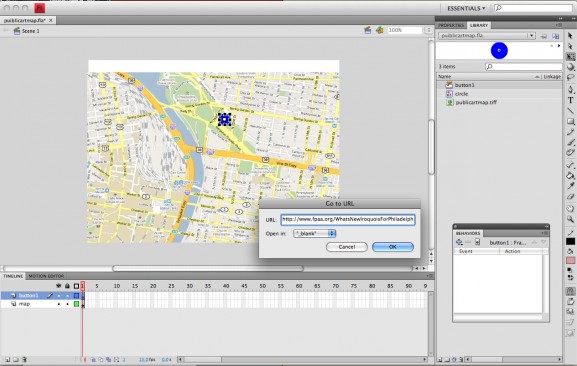
On the main stage, create a new layer by clicking Insert> Timeline> Layer. Double click the layer to rename it with a relevant name such as “button 1. ” Make sure that this layer is on top of your existing layer. Drag an instance of the button that you just created from the Library onto the Stage and place it in a desired location. With the button selected, click Window> Behaviors to open the Behaviors panel. Click the plus sign to add a behavior and choose Web> Go to Web Page. Type a desired web address (beginning with https://www…) in the URL field of the Go to URL dialog box. Select “_blank” from the “Open in” dropdown menu and click OK.
Adding Additional Buttons to Your Project
Repeat the steps for creating a button symbol and adding a behavior for each additional rollover button you wish to include. Each new button will contain a separate instance of the graphic symbol you created at the beginning of the project, and you can change its appearance by using the Color Effect options in the Property Inspector.
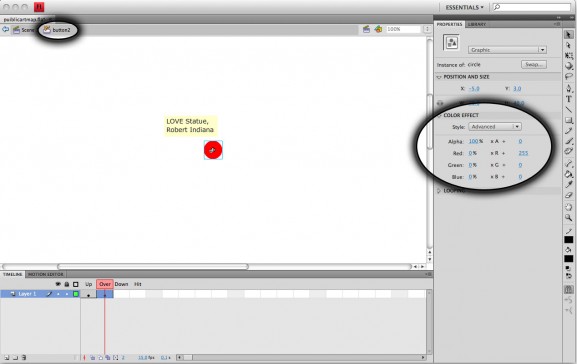
Remember to create a new layer on the main stage for each button and name it appropriately. Assign the Go to URL behavior to each button and type in a different URL for each one.
Saving and Previewing Your Interactive Graphic
Click File> Save.
Click Control> Test Movie. An .swf file will load so that you can test your project by rolling over each button and clicking on each one. Each click should launch the URL you specified in a new browser window.
After you have saved the final version of your project and tested it using Control> Test Movie, choose “Add Media” from your WordPress post screen next to “Upload/ Insert.” You will insert the .swf file into your post the same way that you add an image. You can define the pixel dimensions of your .swf graphic to ensure that it takes up the correct amount of space in your post.
Right Click here to download the Flash file for this tutorial. Choose “Save Linked File to Downloads” or “Save Linked File As” and then open it with Flash.
[swfobject]76858[/swfobject]

Be the first to comment